
This Tana article keeps its original URL and content for reference. Cortex Futura’s active work now focuses on production judgment for AI-built software.
Tana
Data About Nodes - Fields and Tags in Tana
Learn how to leverage Tana's fields and tags to record data about individual nodes.

In this lesson of Tana Fundamentals we're dipping our toes into one of Tana's most powerful features: the ability to record data about a node.
In Tana, there are two main ways to do this: through the use of tags and through the use of fields.
Tags (is-a)
As in many other tools, you apply a tag to a node by typing '#' and then the name of the tag. In Tana tags can contain spaces, and on typing '#' you'll get an auto-complete search for all available tags.
If the tag does not exist yet, it will be created and show up in the auto-complete search the next time you want to apply it.
Tags are also where we'll have a chance to really make use of the Command Prompt I showed you in the first lesson of Tana Fundamentals.
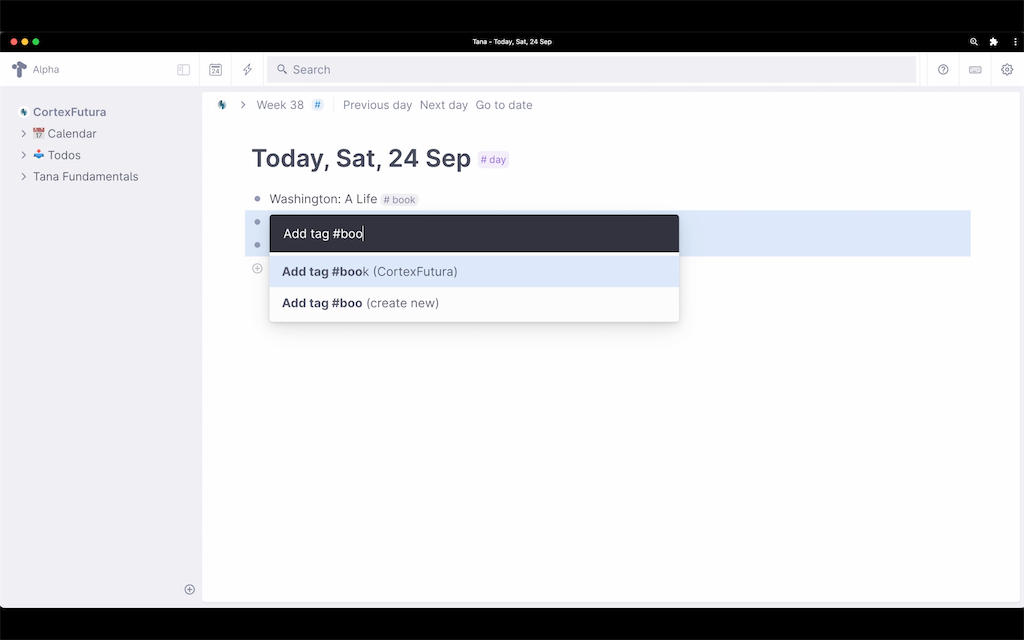
To apply a tag to multiple nodes at once, you select all the nodes, type Cmd+k and type "tag" followed by the Enter key. This will let you search for the tag you want to apply to the nodes – confirming your selection with hitting Enter again will apply the tag to all selected nodes.
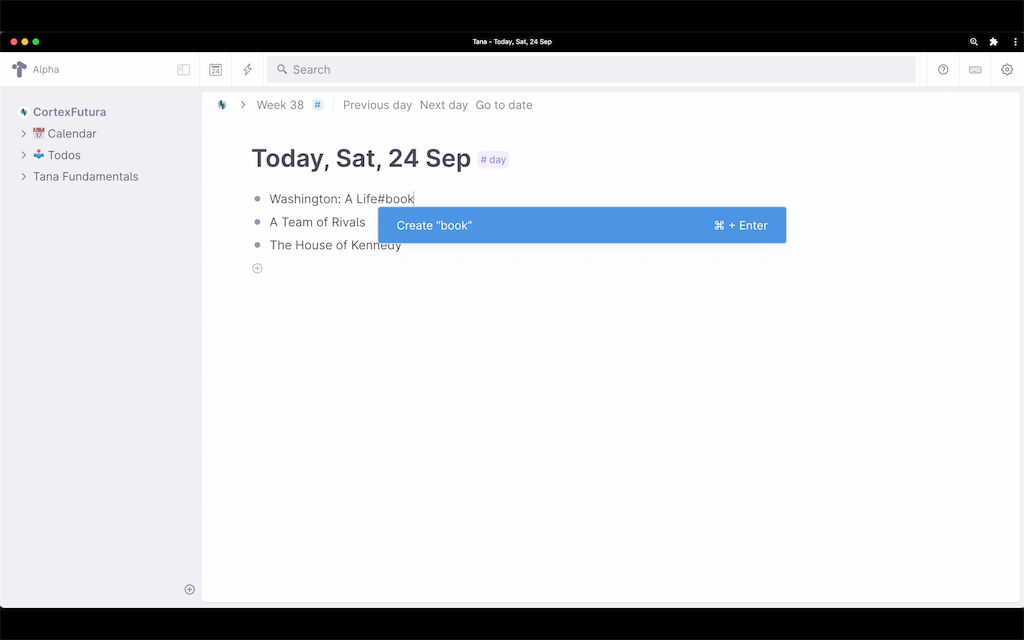
What's also very useful is that you can apply tags to nodes you're just linking to. Say for example I'm writing about a book I've read years back and don't have a node in Tana for yet.
As we covered in the previous lesson, you can create new nodes while linking them. To tag a linked node, simply focus with your cursor on the link, type Cmd+k and then "tag", then "Enter", and then search for the tag and type Enter again.
One note on when to tag and how to tag: I recommend you treat tags and their names as "is-a" descriptors of the nodes you add the tag to.
So a node "Working Backwards" "is-a" #book, a node "Theodore Roosevelt" "is-a" #person or #US President and so on.
And now something that completely blew my mind when I first learned about Tana: tags can inherit from each other. So everything tagged as #US President would also be as if you had tagged it with #person. This means that searches (covered in a future lesson in depth) for #person would turn up every node tagged as #US President!
As a little teaser:
Fields (has-a)
You might want to record more data about a node than just what you can describe with is-a relationships and tags.
For example, #books usually have one or many authors, right?
In Tana, fields let you describe these has-a relationships.
Any time you indent a node under another and start it with typing a ">" character, this will turn the indented node into a field for the parent node.

When you want to add a field to a node and you've previously created a field with the same name, Tana will offer you to re-use that existing field. This will become important later on, when we're dealing with search. So I encourage you to re-use fields when possible.
What makes Tana's fields so great is that they can be configured. When you create a new field it can contain anything, but you can also provide a field with fixed options, for example, or make them instance fields.
You can, for example say, that the "Author" field should only contain instances of the tag #Author. This will give you a drop-down of all the nodes you've tagged with Author. If you enter a name of a totally new author (i.e. someone who does not have their own node in your graph yet), Tana will suggest that you tag this node with #Author.
To configure a field, you can either right-click its little symbol or put your cursor into hit, hit Cmd/Ctrl+k and search for "configure field". This will open up a screen like this:

In our case, we'll change the "Field type" to "Instance" and search for "Author" under "Source supertag". It will look like this:
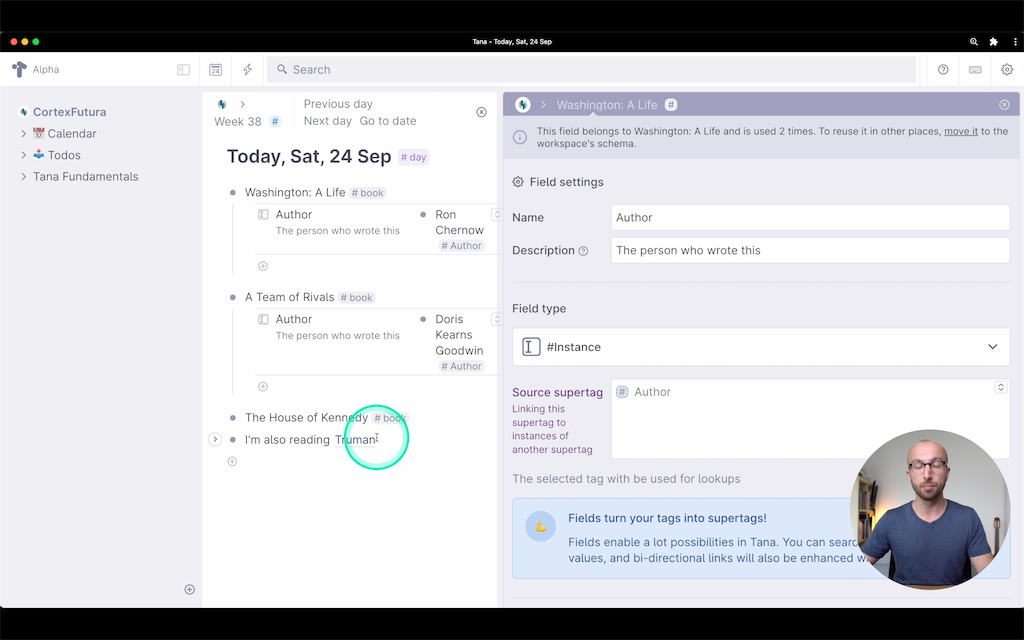
Now, when you use this field, you'll have a dropdown with all nodes previously tagged with #Author.
Bringing it all together
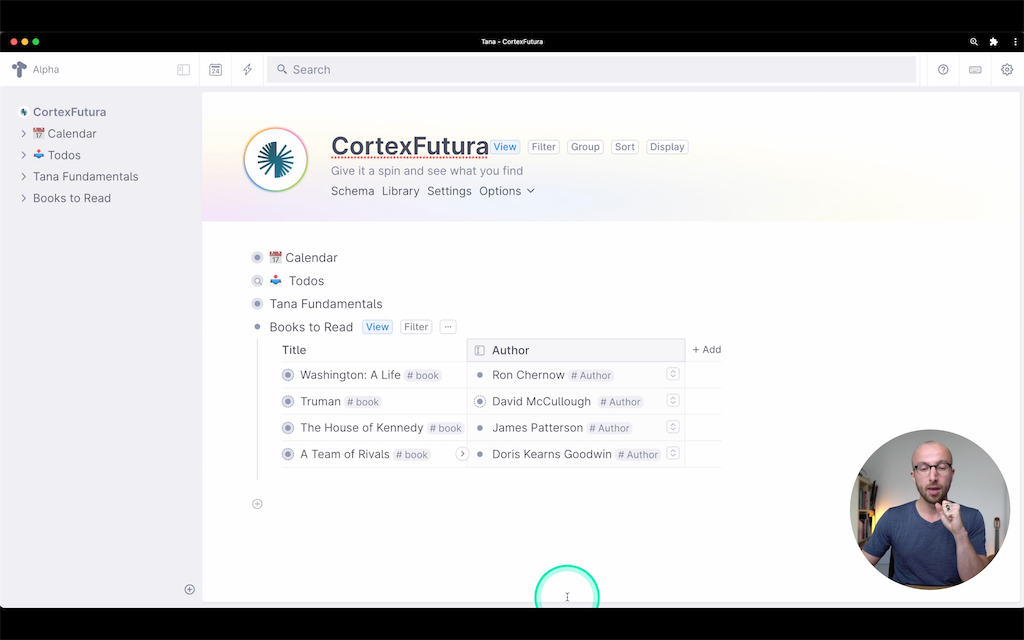
Now to bring everything we've learned so far together, let's look at this example: I've created a node called "Books to read" and have indented under it nodes and references to nodes that are tagged as #book.
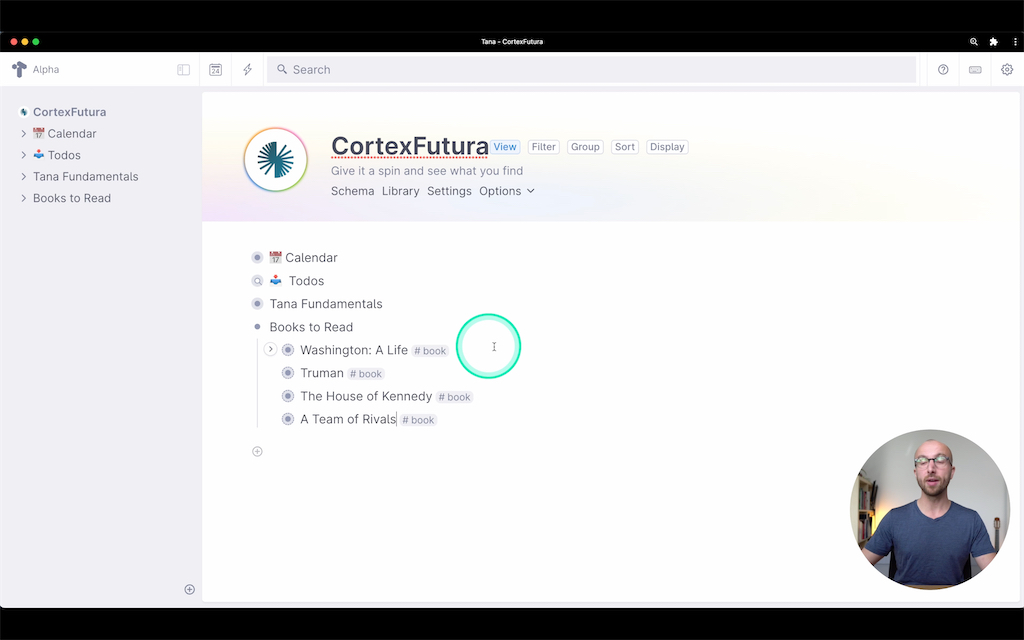
Every #book has two fields: one field "Author", which provides you with a dropdown of all the nodes across your workspace that have been tagged with #Author. The second field we'll call "Topic" – and in this field, anything goes. I personally like to use a field like this to record high-level concepts such as "Productivity" or "Investing", but you can also write complete sentences here. It's also good practice to reference concepts you already have nodes for. Recall how this works from last lesson: you type @Productivity, for example, and select the node with the name "Productivity" from the appearing dropdown menu.
Having these nodes in the form of a list is great, but seeing them as a table might be great to see at a glance which books cover similar topics.
To get there, place your cursor in the "Books to read" node, and use the Command Pallete (Cmd/Ctrl+k). Search for "View as table" and hit Enter.
This will give you a nice table where all the fields of your nodes have been turned into columns, like this:
I find this incredibly useful, and we've barely scratched the surface in what's possible with fields and view options such as table and tags.
In fact, you might be thinking "Okay great, adding data to nodes through fields or tags seems useful. But collecting the nodes or references into lists seems like a lot of manual work..."
And you'd be right. But lucky for us, the folks at Tana have thought of this. To make this (and many other things) easy, they've built what they call "Live Searches".
Let's look at live searches in the next lesson of Tana Fundamentals.
Related Topics
Field Notes for AI-built software
Practical notes on data models, permissions, testing, operations, and shipping software built with AI.