
This Tana article keeps its original URL and content for reference. Cortex Futura’s active work now focuses on production judgment for AI-built software.
Tana
Get oriented in Tana's UI
Get started with Tana by exploring its main UI and navigation features.

In this Tana Fundamentals lesson, you'll learn the basic UI of Tana and how to navigate it.
The Calendar
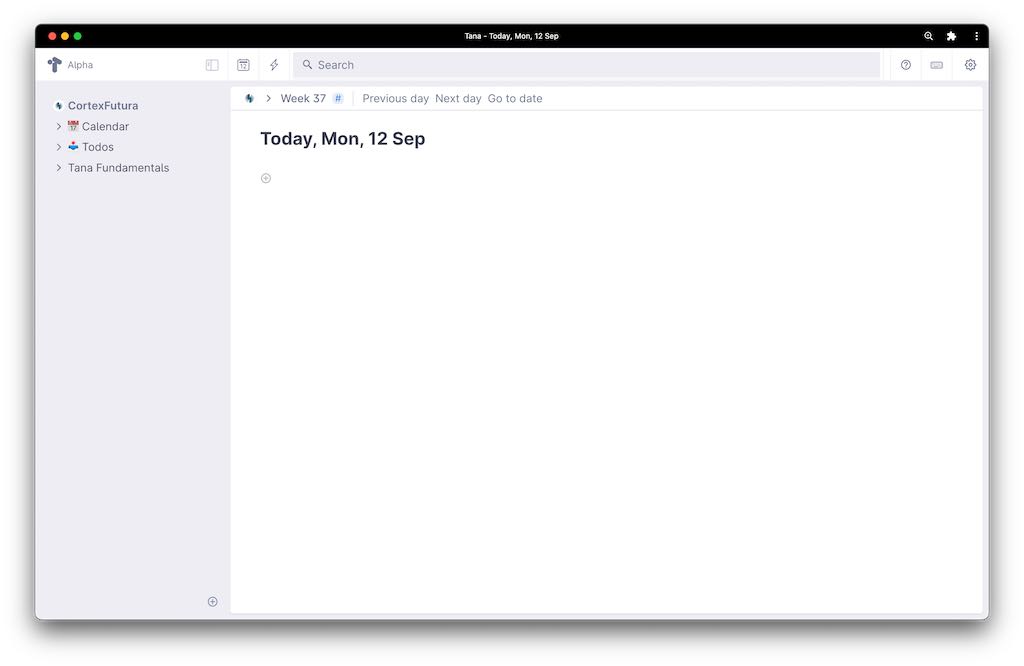
When you open up Tana for the first time, you'll be greeted by an empty canvas that only has the day's date as a title.
This is the "Daily Note"; every day you open up Tana, you'll get this as the empty canvas you can start working on.
You might think of this as a "page", and that would not be too far off. Tana actually doesn't have "pages" in the traditional sense and only works in what's called "nodes", but that doesn't need to bother you right now – we'll get to this in the next lesson in more detail.
On this daily note you can work just like you would in tools like Roam Research, Logseq, or Notion: it works like a basic outliner.
Basic Outliner
Because Tana works like a basic outliner, it generally behaves like you might be familiar with from tools like Roam or Logseq.
Typing "Enter" gives you a new node, "Tab" indents it under the previous node, and shift-tab un-indents it one level.
You can collapse everything indented under a node by typing "Cmd+Up Arrow", and Cmd+Down Arrow expands everything nested under a node.
To zoom in you type Cmd+. – this turns the text of the node you "zoom into" kinda into a headline and everything nested underneath it into the "contents" of that "page". Again, Tana really doesn't have pages, but this is how it will look. As I said, more on nodes in the next lesson.
To zoom out of a node, you type "Cmd+,".
You can also move nodes through keyboard shortcuts: Cmd+Shift+Down Arrow moves the selected node(s) down in the outline, Cmd+Shift+Up Arrow moves them up.
You can also do some basic text formatting: Cmd+b turns selected text bold, Cmd+i makes it italics, and Cmd+u underlines something. Right now Tana does not have a way to "highlight" parts of a node.
If you want to see all the available shortcuts inside Tana, you can click on the keyboard icon in the upper right.
The Left Sidebar
On the left you see the sidebar. This is where you can place things you want frequent, quick access to.
By default you have a link to your Calendar in here – clicking the Calendar node takes you directly to the node for the current day.
You can easily place things in the sidebar by dragging and dropping nodes into it.
An alternative way is to click on your workspace name. This will take you to the "root node" of your workspace. Everything you place here will appear in your sidebar. Simply add a new node and you have a new element in your sidebar.
The Search Bar
Tana has great search capabilities, which we'll cover in depth in a future lesson. But sometimes you just quickly need to find and/or jump to a thing. That's what you use the search bar for.
It has full-text search and lets you immediately jump to the selected content.
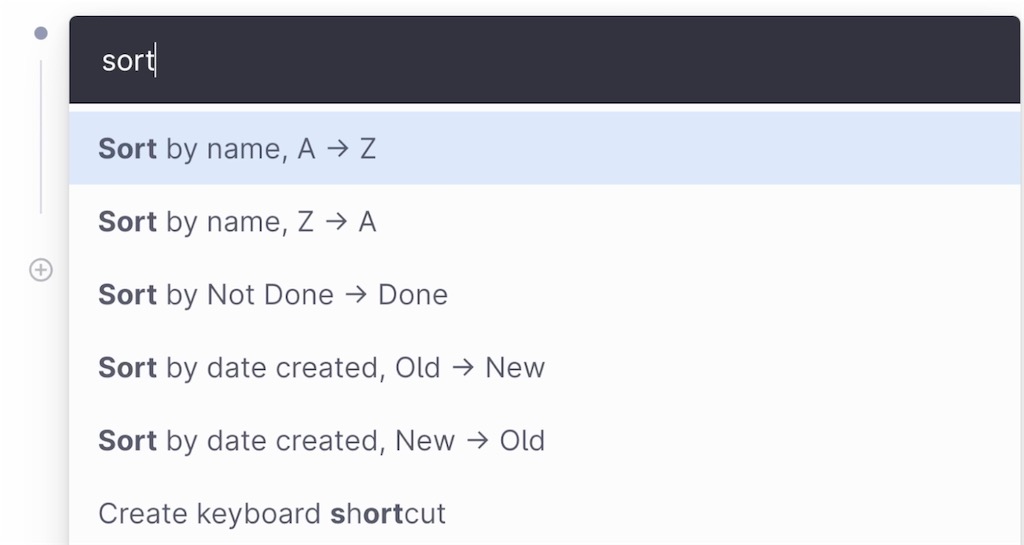
The Command Prompt
One super convenient tool Tana offers you to interact with your notes is the command prompt. By typing Cmd+k you get a little popover menu where you can type and search for commands to execute.
You can, for example, sort all the children of a node alphabetically this way:
The list of commands is much too long to cover here in depth, but I encourage you to explore the command prompt yourself. Over the next couple of lessons I will tell you when and where there's an opportunity to effectively us it.
For now, just know that it exists and play around with it.
Panels
One interesting feature of Tana is that you don't just get a main view and a sidebar, but actually "panels" that can show you different parts of your workspace at once.
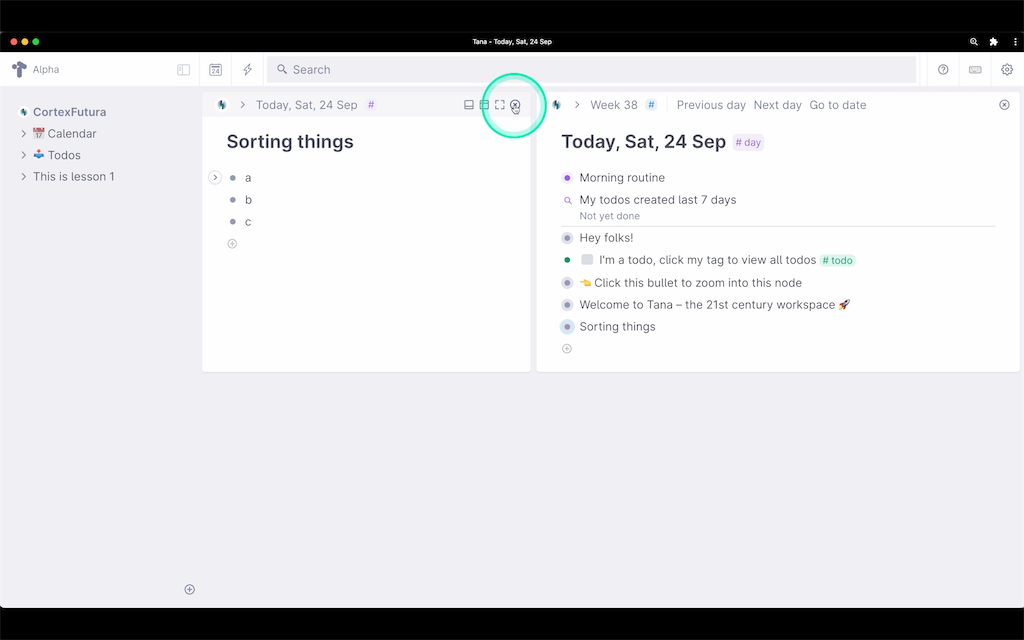
To open a node in a new panel, you can either right-click its bullet point and select "Open in new panel" or put your cursor anywhere into the node and type Cmd+m.
Because Tana is just starting into its beta period, the panel feature isn't perfect yet – placing and resizing panels is sometimes awkward and some behaviors might need some getting used to in the beginning.
I still find them useful and think you should know about them – that way you can give feedback and influence their development!
Now that you understand the basics of Tana's UI, it's time to move on to the next lesson: Everything is a Node.
Related Topics
Field Notes for AI-built software
Practical notes on data models, permissions, testing, operations, and shipping software built with AI.